Manual
-0 Overview
To use this software
you need to master your computer and have some knowledge of HTML.
This
manual explains how to use SupSubmit, a software that fills up forms automatically.
With SupSubmit you can easily submit your website to search engines or
directories. This software has been programmed to work as fast as possible.
This software is not for beginners and you need to have knowledge of HTML
to use the software, but you'll save a lot of time once you master the
software.
The
goal of this manual is not to cover all functions of the software, but
it explains what most users need to know. It is also recommended to watch
the online flash tutorials, since they are probably easier to understand.
Menu :
-1
Getting started with this software.
-2
How to add new sites?
-3 How to add datas to submit?
-4 Save file rules.
-5 How to use different fill rules?
-6 Auto-scrolling.
-7 Use the software to sort websites in different categories.
-8 Different ways to add a category to a site.
-9 How to detect and send mails?
-10 How to handle reciprocal files?
-11 How to create a thumbnail?
-12 Customize reference links.
-13 Addendum on the buttons of the software.
-14 Known bugs.
-15 Technical support.
Flash
tutorials:
How to add links to
your submission list? - Go
How to add informations to fill forms? - Go
How to fill forms automatically? - Go
How to fill up non-textual form fields? - Go
How to detect reciprocal links (recip) in HTML files? - Go
How to generate and use blocks of reciprocal links (recip) using the software?
- Go
How to generate pages with blocks of recips without using blocks of recips?
- Go
How to filter a file with reciprocal files (recip)? - Go
How to detect and use mail links? - Go
How to use the function "Pastml"? - Go
How to use categories to filter a list of sites? - Go
-1
Getting started with this software :
If
you are a beginner, you could think that the layout of Supsubmit is overloaded
and hard to understand. Think twice: if a software needs a big number
of settings, with a good number of panels and submenus you software will
be clearer and much easier to understand, but how many time will you spend
while swapping from a panel to another?
For
the moment this is a choice: the layout of SupSubmit looks a little overloaded
and you have the most important commands on the main screen, so you will
save time. It is very easy for a programmer, to move buttons and check
boxes, so this may change in the future. But believe me, it works very
well like this.
To use SupSubmit,
you need:
- A list of websites
to submit your datas.
- Datas to fill up websites's forms (a website, title, description, URL...)
- Rules to fill up specifically your forms.
Without
a list of websites, the software works but nothing defines where you want
to submit your datas.
Without
rules to fill up your forms, you can't fill up forms automatically but
the software works.
Without
datas, you can't just fill up forms and in consequence, you can't define
rules to fill up forms. You can still use the software like a browser
with advanced functions, for example to sort websites in different categories.
If
you experience a problem while a page is loading, click on "x",
it will stop the webpage to load and disable temporary some settings:

+ and - are common
browser functions (back, forward).
 With
this button, you can go the next (or the previous) site in your website
list. With
this button, you can go the next (or the previous) site in your website
list.
-2
How to add new sites?
- Site by site
-----
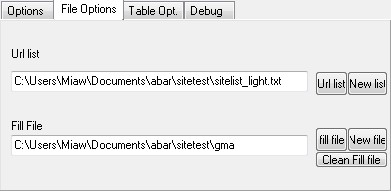
IMPORTANT:
SupSubmit
needs that you create a "Url list" and a "Fill file"
before it is possible to add a list of URL (Url list) and before it is
possible to fill up forms (Fill file).
-----
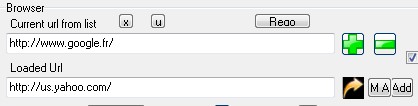
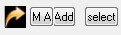
Enter
your link in the text box "Loaded Url", click on the arrow to
load the URL, and click on "Add" to add this link in your list
of sites.

- Add a list of site
Click on "M A"
(mass addition), then paste your list of sites, then click on "Add"
in the new window.
- Update a site in
your list of sites
There is 2 ways:
- You
can click on "select", click on the site you want to update,
then "Edit" and once you updated your informations, click on
"Save" (important).
- You
can also click on the "u" button (update).
If you
click on "u", your reference link in your list of sites will
be replaced with your "Loaded Url".
Since
you can accidentally click on "u", this button has a temporary
effect. To keep this modification, you need to save your datas (like before:
click on "select" then on "Save").
-3
How to add datas to submit?
-Using a data key.
-----
IMPORTANT:
SupSubmit
needs that you create a "Url list" and a "Fill file"
before it is possible to add a list of URL (Url list) and before it is
possible to fill up forms (Fill file).
-----
Click
on "Edit Keys", then click on "+" , in the new window,
to add a key.
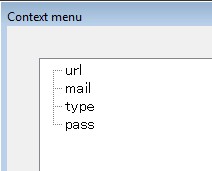
In
this menu, this is a key labeled "url". This key is protected
so you can't delete it, but you can edit it. Ideally, "url"
should be used as the root of your website and should finish with a "/",
like a domain name for example. Since this key is used if you use functions
related to reciprocal links, these functions won't work if you use this
key for something else or if you use a URL that finishes with .html or
.php.
- Using an XML file
(like a PAD file for example)
You
need to click on "Edit keys", then go in the panel "Xml
file" and click on "...":
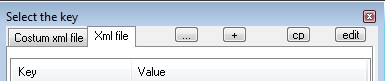
Load
your XML file, and the keys of this XML file should be loaded. There is
2 ways to use these keys:
-
Click on a key, then click on "+" to add a key from your XML
file to your standard list.
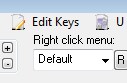
- You
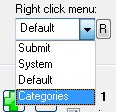
can also go on the panel "Right click menu"...:
...then
click on "Can
select Xml keys from file".
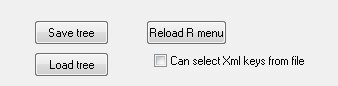
With
this option, you can use your keys from your XML file directly like standard
keys.
Note:
It is only possible to load very simple XML files: this function has been
thought to load PAD files, used by shareware developers, and nothing else.
However it is sometimes possible to load other XML files, that's why this
function is described as a function to load XML files and not only PAD
files.
-4
Save file rules:
- Using the context
menu
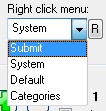
To
use your saved keys (as explained in part 3), you have first to select
the good context menu: so select "Submit" to customize your
context menu for submissions.
With
this context menu, each time that your mouse cursor in on a form field,
your context menu is the menu that you can find in the panel "Right
Click Menu":

If
you select one of these keys, you can fill up your form field with the
value associated with this key (for instance: "url" --->
URL of your website).
If you
want to save an association between a key and a form field (form field
-- key -- key value), check the "Save mode" option.
- Using the "U
keys" menu (form fields and key values)
This
menu shows your associations in the current file mode.

So click
on "U keys" to open this menu, and click on "Add"
to add an association for the current fill mode.
In
"Field", enter the name of your form field (check the HTML code
of the page; or check "Input" in the debug panel while your
mouse in on a form, or check the bottom of the software while your mouse
in on a form field).
You
can't fill up the line "Key" directly, but you can click on
the "Key" button and click on one of the key of the software.
-5
How to use different fill rules?
-How it works?
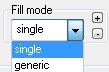
To
fill up a form automatically, you need to have an association between
a form field and a data key.
But
you have also to tell to the software how to do this association:
In "single" mode, this association is done for a single URL:
the loaded URL. In "single" mode, you fill up a form with the
association you have chosen for the "Loaded url" (if there is
an association for this URL).
In
"generic" mode, this association is done everywhere: if the
name of a form field is associated with a key value, then all form fields
with this given name are filled up, when requested, on other webpages.
Example:
let's say that we have this HTML code in a form:
<INPUT
type=text name="myname">
If
a "generic" rule defines an association between a key and this
part of a form, then if you try to fill up another form, somewhere else,
if there is on this form a field form named "myname", then the
value of this form field will be set to the value of the key associated
on a previous form, if you try to fill up this form.
You
can use the + and the - buttons to create (or delete) new rules that will
work like the "generic" mode.
Be
warned that these "generic" modes (the basic and the others)
use more and more time as there is more and more associated rules, that's
the reason why you should use the "single" mode (with the minimum
rules) each time it is possible.
The
first purpose of the "generic" mode is to create a "single"
mode fastly: you have just to fill up a form in "generic" mode
with one of the fill buttons...
...
and check in the same time "Save mode". Supsubmit will save
in "single" mode every rules it is able to find in "generic"
mode.
If
you submit to a site that uses sessions that change every time the URL
where you have to submit (like for example on some forums), it is not
possible to fill up your form in "single" mode. Here, the best
solution is to create a new fill mode using the "+" button,
to select it, and to save your associations in this new mode.
There
is 2 main ways to fill up forms with Supsubmit:

- automatically:
Check
"Autofill": the default fill mode is the current one, the fill
mode is set to "single" each time you go to a new link.
If
you check "SFill mode", your fill mode is the latest you have
chosen when you saved your last key for the "Current url from
list", this URL is supposed to be always the same and
is set for the loading page you have chosen.
If you
check "Force Fill Mode", your fill mode will always be the same
as long as you don't change it yourself:
- manually,
using the drop down menu:
- automatically,
if you chose one of the button that sets as well the fill mode:
(it
means "Fill Single ", "Fill generic", "S'nFill
Single", "S'nFill Gen".)
In the
same way, if you click on one of these buttons, your fill mode will be
the one associated with this button, as long as nothing change.
"Autofill"
will work once a page is totally loaded or if you change your current
browser panel (this last behavior can from time to time make the software
bug on a page that takes time to load, here, click on the "x"
button of the browser).

- On
command:
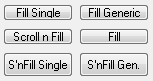
Using
these buttons:
Fill
single: The software switches to single mode then tries to fill in
"single" mode. The software doesn't try to scroll the drop down
boxes (or scroll menus).
Fill generic:
The software switches to "generic" mode then tries
to fill in "generic" mode. The software doesn't try to scroll
the drop down boxes.
Scroll
n Fill: The software fills in the current fill mode (the software
doesn't try to change it), and tries to scroll the drop down boxes.
Fill: The software fills in the current fill mode (the software
doesn't try to change it). The software doesn't try to scroll the drop
down boxes.
S'nFill
Single: The
software switches to single mode then tries to fill in "single"
mode. The software tries to scroll the drop down boxes (or scroll menus).
S'nFill Gen: The
software switches to "generic" mode then tries to fill in "generic"
mode. The software tries to scroll the drop down boxes (or scroll menus).
These
6 buttons have nearly the same effect, and it would be easy to create
only one single button. This would probably give a better aspect to the
software, but the fact to have 6 buttons instead of 1, saves time.
-6
Auto-scrolling
You
can use the auto-scrolling function to change automatically the value
of drop down boxes:

How
it works:
To
use this function, you need to enter keywords in the "Scroll words"
menu:
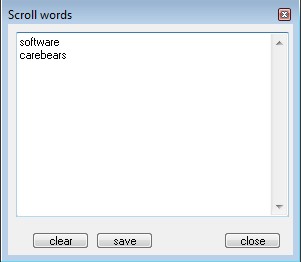
These
keywords will be used to detect a good line in a drop down box. Press
on ENTER to separate each keywords. When this function is used on a page
with a drop down box, the software takes the first keyword of the list;
tries to search if this keyword is somewhere in the drop down box and
if yes, the software tries to scroll the drop down box to the first
line that contains this keyword (or not to the further lines!), so
you have to use specific keywords.
More
a keyword is specific and more it should be at the top of the list.
This
scroll function is not perfect or universal, but according to our tests,
this function should be efficient.
The
software has been programmed so that it is only possible to scroll a drop
down box if you fill another form field. It is not possible to dissociate
these 2 functions.
You
can save a lot of time on big drop down boxes if you use this function,
however more there are entries and more the software can temporary freeze.
On a drop down boxes with more than 10000 entries it can take up to 20
seconds (and sometimes more on old systems).
There
is 2 ways to use this scroll function:
-
Manually: using buttons associated with the scrolling function ("Scroll
n Fill", "S'nFill Single", "S'nFill Gen.").
-
Automatically: if you check "Autofill".
There
is a switch within the software that activates or deactivates the auto-scrolling.
This switch is enabled or disabled using the fill buttons (like in the
manual mode):
As
long as the last button on which you clicked is associated with the scroll
function, if you are in "Autofill" mode, you will also scroll
the drop down boxes. In the other case, the software will fill your form
fields without trying to scroll your drop down boxes (in some rare cases
you can save time if you disable this option).
In
summary: To use the "Autoscroll" function in "Autofill"
mode, you have first to click on a button that uses this "autoscroll"
feature ("Scroll n Fill", "S'nFill Single", "S'nFill
Gen.") then be sure that "Autofill" is checked. If later
you click on "Fill Single", "Fill generic" and "Fill"
you will disable this function.
-7
Use the software to sort websites in different categories
Usually,
if you need to submit content to a list of websites, you don't need to
submit this content to every sites of your list but only to some of them,
that's why it is useful to have a way to filter websites and that's why
there is a function with which it is possible to assign a category to
website.
To go
in the category menu, click on the button "Choose Categories":

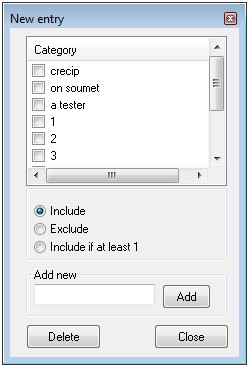
To add
a new category, enter something in the text field below "Add new"
and click on "Add".
There
is a protected category named "crecip" and it is explained later
how to use this category. Note that if you right click on one of these
categories in this panel, it is possible to add all websites in this category
in the category "crecip", it is also possible to do the opposite
and to remove these websites from this category.
If
a check box is checked then this website will be selected (with "Include"
or "Include if at least one") or not (with "Exclude"),
in function of the option that you select.
-8
Different ways to add a category to a site.
How
to add a category to a site:
- With
a right click on the "Cat" button (and only on this button)
and for the current website ("current url from list"):
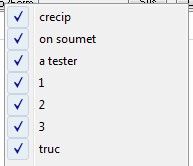
-
If you select "categories" as right click menu:
You
can see, for example, a menu like this one below if you right click on
the browser window:

-
If you go in the panel "File Entries" (click on "select"
to go to this menu):
Choose
one of the sites and right click on it.
-
Finally, and only for the "crecip" category, using the "recip"
box for the current site:
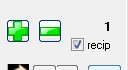
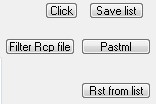
With
the "Save list" button, you can save the current list of websites
in function of your category filtering:
-9
How to detect and send mails?
- How to do ?
To
detect a mail, you need to go with your cursor on an <href> tag
with a "mailto:", if the box "Pop on email" is checked,
an option "Send mail" will appear next to your cursor and if
you want, you will be able to use the datas of the <href> tag to
send a mail.
Please
note that the mail panel handles only the primary recipients (to:) and
not the secondary ones (cc: and bcc:)
Here
is the mail panel that will be displayed:
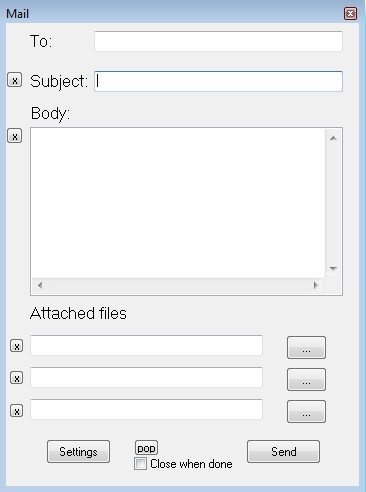
It
is of course possible to send a mail without a tag detection.
A
mail can't start without the good "Settings" (smtp and pop)
that your host or you ISP gave you probably.
The
"pop" key is used to connect then disconnect to your pop account,
and nothing more: some hosts ask a recent connection to your pop account
before you can use your smtp account to send mails. This button has no
other function and does nothing else.
-10
How to handle reciprocal files?
Reciprocal
links are usually requested by websites or directories. A reciprocal
link is usually a link that you add in your website in the profit of the
website where you want to be listed yourself. For convenience' sake, i'll
call these links "recips", because it's shorter. For the software,
a "recip" is the HTML code for this link. If you submit to a
lot of websites, their automatic or semi-automatic handle is useful.
Supsubmit
can handle this kind of links. All links have to be known and added to
a unique HTML file. A "recip" has to be separated from the others
with a <table> tag in your HTML file, (<img> and <href>
tags, can work too but a <table> tag is better, lowercase
only). You have to give to SupSubmit a keyword to detect the "recips".
The software will screen for some tags of the HTML file with the "recips"
(<table>, <img> and <href>) and check if there is one
of the keywords in the tag. If a site is in the dedicated category "crecip"
(if the "recip" box is checked when this site is loaded), then
the first tag that the software find with the keyword associated with
this site is assumed to be a "recip" specific for it. This "recip"
can be used:
- to create a new
file of filtered "recips".
- to create a file with ordered "recips" (semi-automatic).
- to create directly web pages with "recips" using an index
(automatic).
Remember:
please separate your "recips" codes with <table> tags
in your HTML file (use an HTML editor).
- Detect "recip"
files
To
detect a "recip" code, you have to associate a keyword with
each site that needs one. To set this keyword, click on "Urls Settings",
choose a site and to set the keyword for it, click on "set keyword".
Some
characters can't be used as keyword because they are used as separator.
<
> : and / are not allowed.
Tip:
if you can't find a good keyword for your "recip", add a <table>
tag with your favorite HTML editor, add a comment (invisible tag) that
contains your keyword then paste your recip. This invisible tag can be
used to detect your recip.
Usually
the best keyword is the domain name of the website that asks the recip.
You can set directly this domain name as keyword:
- with
the "Urls Settings" panel: right click on a site and choose
the good option.
- when you add a list of sites using the "M A" panel (massive
addition), just check "Use domain as recip keyword" before you
click on Add.
(However
the domain is not always a good keyword.)
Here
is how the software processes these "recips":
-
Generate a temporary file of filtered reciprocal links.
This
temporary file is a file of filtered "recips" in function of:
-
your current websites (in function of the categories that you checked)
and
- the websites in the "crecip" category (recip box is checked).
It
is supposed to be a file with all the "recips" that will be
used for a submission.
To
filter a raw "recip" file:
-
You need first to have all the "recips" of the websites where
you want to submit, in a unique raw HTML file even with "recips"
that you want to exclude. Each "recips" has to be separated
from the others with a <table> tag (or eventually but not recommended
with a <img> or <a href> tag). Do it with an HTML editor,
like Dreamweaver for example.
-
In the software, all websites with a "recip" have to have a
keyword to detect their own "recip". It is important that this
keyword is unique and specific for the "recip" (check in the
panel "Urls settings", "Set keyword"). The domain
name of the website that asks for the "recip" is often a good
keyword, but remember that this keyword has to be in the HTML code of
the "recip".
-
You choice of categories has to be so that all sites with a "recip"
that you want to use are selected.
-
All websites with a "recip" and where you want to submit, have
to be in the "crecip" category (a checked "recip"
box).
Then
to filter a raw "recip" file, just click on "Filter Rcp
file" on the main panel.
You
will get a list of filtered "recip" from your raw list. You
can check this new HTML file of "recips" in a browser.
Note
on "recip" files:
-
Adding £££ in a "recip" file,
will stop the extraction of "recips" when the software reach
this code.
With
£££ in HTML code you see £££
in your browser.
- Semi-automatic
generation:
With
your filtered "recips" file (like explained before), you can
create a file of ordered "recips".
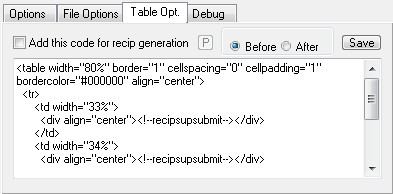
If
you want, you can use these "recips" to create tables with several
"recips", just go to the "Table Opt." panel:
Check
the box "Add this code for recip generation", click on "P",
select you file of filtered "recips" (generated as before),
and create a file of "recips" filtered and ordered.
Each
code <!--recipsupsubmit--> is replaced with a "recip"
code, and the code of the text area of the "Table Opt." panel
is pasted to a file until there is no more "recips" in your
source.
The
ordered file is a file that will be used for the generation of the pages
that you will create for your submission. Each "recips" is added
to a pack of several "recips" and each packs will be used later
for file generation.
Like
before, you can check your file of ordered "recips" in a web
browser.
IMPORTANT:
After you create your blocks of "recips", always uncheck "Add
this code for recip generation".
If you
want to create your final pages, here is how to do:
Go
in the panel "Urls Settings" : click on "Create files",
select you new file of ordered "recips" and the index that will
be used as reference to create your new pages. Basically an index is the
page that you submit but without the "recips".
If
there is a tag <!--recipsupsubmit--> in your index file, each tags
will be replaced with a block of "recips" (a <table> tag
that contains one or several "recip" keywords) to create a new
file. Your block of "recips" will be added at the beginning
of the <body> tag of your index file.
Each
file is generated and you can check your generated files to see if the
result is what you need. In the other case, delete the generated HTML
files and click on "reset".
Check
the box "Warn on different domains" on the panel "Url Settings":
a message will pop up if you try to fill a form while you are on a different
domain than the domain of you "Current url from list". It is
sometimes useful to uncheck this option, but it prevents sometimes to
submit links with a bad "recip".
If you
are happy with the web pages that you generated, upload your files on
your website manually, check the option "Extra url" in the options
panel on the main window. Each files will be used to create a new URL
based on your "url" key (click on "Edit Keys" to know
the value of this key "url").
If
"Extra url" is checked, each time that you try to use the value
of "url", the final value will be function of the file that
you created for the "Current url from list"
e.g.:
mainindex.html
+ url= http://blabla.com/ --> http://blabla.com/mainindex.html
-Automatic
generation:
Starting
from your filtered "recip" list, it is possible to do faster
but the result is usually not very clean:
Go in
the panel "Table opt.", check "Add this code for recip
generation", click on "Urls Settings" then click on "Create
files", select you filtered list of recips then your index.
Your
files are generated like before. Be sure to check at least the last file
that is generated. Usually this way to generate files with recip is not
so very good because you can't control your tables of recips but it is
faster.
- Manual
generation:
Paste
your recips code manually in your pages and use the software to detect
where are your "recips" in your files:
"Url
Settings">> "Select files" >> select your link
(or use CTRL and SHIFT to select several files in the same time) >>
click on "Open" then click on "Check from files".
Each
"recip" is attributed to the good site. A single "recip"
can't be in several files.
Click
on "Reset" if you need to restart.
-
Adding a "recip" code or replacing a "recip"
code:
On the
main window there is a button "Pastml"

This
button is used to add easily or replace an HTML code in an HTML file.
You
need to have an HTML code in your clipboard, and this code has to contain
a web link. Here, you can click on the button "Pastml" and a
dialog box should appear while your clipboard is temporary saved in the
software.
It
is now possible to paste this code that you had in your clipboard when
you pressed on the button in an HTML file, even if you change the content
of your clipboard.
The
result is function of the HTML file that you select:
-
if there is a <!--recipsupsubmit--> tag in the source code
of your HTML file: the first tag will be replaced with the content saved
from your clipboard.
-
if the selected HTML file contains one of the keyword associated for "recip"
detection in a <table> tag, SupSubmit will try to detect the section
that contains this keyword and this section will be replaced with the
code that you had in your clipboard.
Please
note: the software uses a function that replaces everything: if the section
that detects the software is several times in your page, these sections
will all be replaced. If your code is not in a <table> tag, your
code won't be detected.
-
If there is no keyword detected: if a <table> tag is detected, you
can if you want append the content that you had in your clipboard after
the TR or the TD tags of the first <table>. It works well with a
<table> of a dimension of X*1 or 1*X, otherwise this function is
not recommended and it is better to use <!--recipsupsubmit--> to
have a good layout.
-
Finally if you don't want to add the content that you had in your clipboard
to a <table>, you can finally paste this content at the beginning
of the <body> of your HTML file (if you see it at the end, check
the panel "Table Opt.").
Remember
that this function "Pastml" is used to paste "recips"
links on the fly in <table> tags and it's goal is to be as generic
as possible.
-11
How to create a thumbnail?

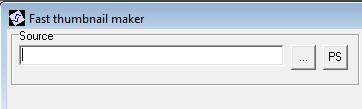
FastThumbs
is a very basic software that works well to create thumbnails. These thumbnails
are usually asked while you submit to websites.
To load
a source picture, the easiest way is to drag and drop this picture to
the FastThumbs's screen, but you can also use the "..." button
(at the left of the screen):
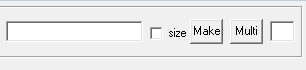
Enter
the size of your thumbnail using these 2 small boxes:

First
box (90): Horizontal size.
Second box (120): Vertical size.
Create
a selection in your picture and when you are happy with what you selected,
click on "vvert" or on "vhor" to give to your selection
a size proportional with the size of your thumbnail (it prevents distorted
pictures), then click on "make" at the middle top of the screen.
If you are not happy with the result, click on "show" to go
back to the selection screen.

If you
want to create a new selection, right click on the picture to cancel the
selection.
To give
a name to your file:
-
Or: enter a name (without a path) in the text area for the filename (at
the right top of the screen), click on "Make" and the picture
is saved in the same directory as the reference picture. A jpg extension
is added to the filename.
- Or: click on "Make" (right part of the screen) and enter a
name.
Since
FastThumbs has been created to create thumbnails for the current moment
during a submission, if you entered a filename that already exists, the
previous picture will be deleted and lost without confirmation.
Check
that your resulting thumbnails fits with your needs, and check that there
is no white zone in your thumbnails because of a bad selection.
-12
Customize your links
- Main page and other
pages
To add
other pages to an existing reference page of your list, set the context
menu to "System":

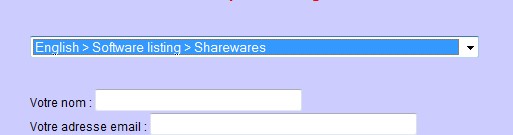
If you
right click on the browser, you will get a context menu that changes in
function of the HTML tag on which is your mouse:
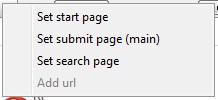
You
can here set your index, your main page, and your search page:
The
main page is the submission page and the default page.
The index is what you want but it is ideally the main page of the website.
The search page is again what you want but ideally, it is a page that
contains the search engine of the site (it can also be Google or Yahoo).
If you
change the main page, the change of this setting is only temporary (it
changes temporary the URL associated with the "Main" button).
If you
use the system menu and if you choose "Set start page" or "Set
search page", you need to confirm your choice on the page that you
want to use:

To
prevent bugs, it is better to click directly on one of these buttons ("This"
to confirm, and "Cancel" to cancel).
Later,
you will be able to choose another loading page that the submit page:

Important:
you need one address per page:
For
example, if there is only 2 sites on 100 for which you set a search page
and if you check "Search", you will only be able to go to these
2 pages with a search page and nothing more!
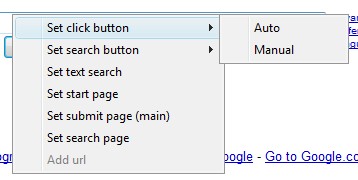
-
Autoclick and AutoNext
If you
click on a form field with the "system" context menu, you'll
get this:
(It
is not recommended to use these functions)
Set
text search sets the name of form field associated with the search
engine of the website on the search page of the website (if it exists).
Set
search button can be used to click automatically on the search button
of the search page (not recommended and not universal).
Set
click button can be used to set the click button of the submit page
(not recommended and not universal).

If
you set these buttons, you'll be able to use the "AutoClick"
feature (this function is not recommended to use, unless your submissions
are safe to do, like with search engines like Google for example). You
won't be able to use the "AutoClick" feature without it.
Here,
the form is filled (Autofill) then clicked (Autoclick).
The
"manual" or "auto" mode, sets the behavior or the
"AutoNext" function:
In
"Auto" mode, AutoNext will be applied if the "AutoNext"
box is checked, in the other case not and even if the box "AutoNext"
is checked.
After
a box is filled (Autofill) then clicked (Autoclick), if the resulting
page is totally loaded, the AutoNext feature will do that the software
goes automatically to the next site of your list and loads it to the current
browser.
It is
also possible to click additionally on "Next Tab", so your submission
will be performed with the 10 browsers.
Theorically,
it is possible to do a submission that works without human intervention,
however this is really not recommended: first it is not always possible
to simulate a click on a submit button, but it decreases also your control
of the submission (you can make errors) even if you should work faster.
That's
why it is really not recommended to check "Autoclick" and "AutoNext".
Adding
the good parameters for these options takes time, the result is usually
not universal (sometimes it can work and sometimes not).
This
function can be interesting if you need to check fastly the result of
50 search engines on the same request, because a lack of control is here
not really a big deal.
-13
Addendum on the buttons of the software
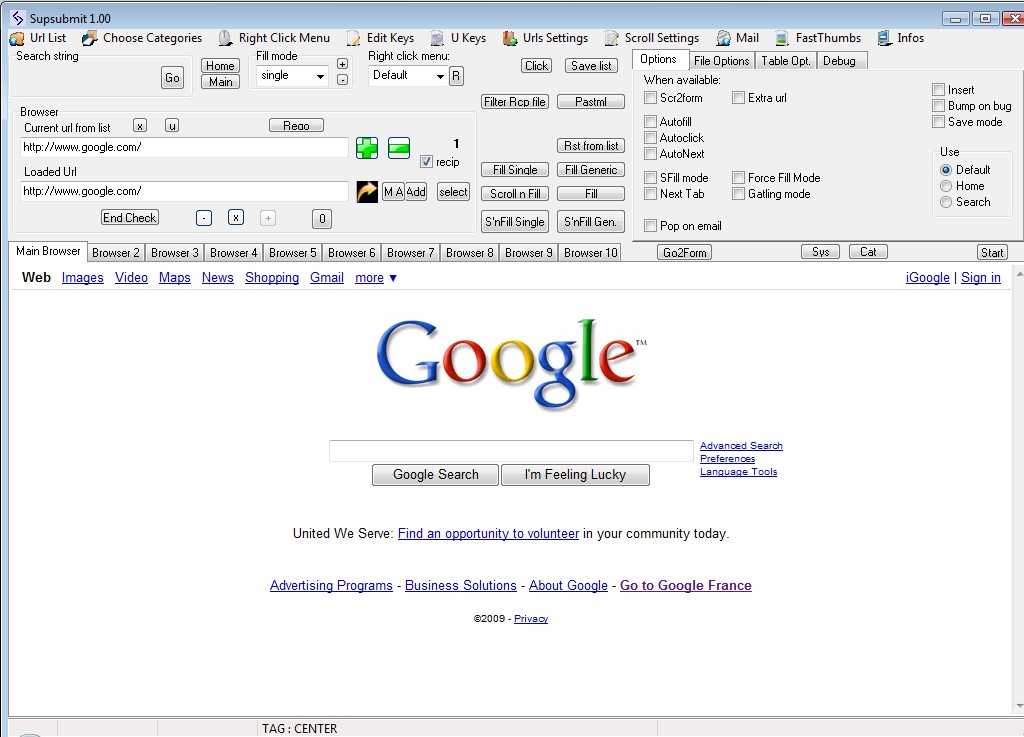
Here
is a screenshot of the software (on
Vista)
Description
of the commands of the Browser:
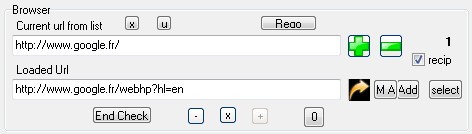
-x
(top): delete the "current url from list" in your submission
list.
-u: Update the "current url from list" with the "Loaded
Url". IT DOESN'T SAVE CHANGES (you need to click on "Select"
then on "Save" to save or use one of the functions that saves
also your submission list).
-Rego: Reload your "Current url from list". After your
click, your "Loaded Url" should be your "Current url from
list".
These buttons change
the position of your submission list and load the link of the new position
in the current browser.
-"1": It is the reference position of your submission
list (here it is 1).
 : if this box is
checked, the "current url from list" is in the category "crecip"
that is used to know if the website needs a "recip". : if this box is
checked, the "current url from list" is in the category "crecip"
that is used to know if the website needs a "recip".
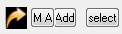 :
The arrow loads the current URL (text box below "Loaded Url"). :
The arrow loads the current URL (text box below "Loaded Url").
M A: Open the panel to add several websites.
Add: Add the current URL in your submission list.
select.: Open the submission list ("File entries").
"-":
Function of the browser: back.
"+": Function of the browser: forward.
"x": Stop the browser and stop every attempts to fill
the form fields: if the software bugs while you load a web page, it is
the first button on which you should click to unfreeze the software.
0: Load the website associated with the current position of your
loaded URLs:
 <this position is given by the number on this screenshot (here it is
1).
<this position is given by the number on this screenshot (here it is
1).
Usually
this 0 button is used to finish a submission. If all websites have been
loaded and when the position of your list reaches again "1",
it allows to load again the first website.
End
check: activate every panels of the browsers: if the current site
has the same position in your list as the website in the next panel,
the software continues to activate the further panel until the software
finds a website with a different position or until all sites are checked.
(in fact while your "current url from list" is the same as in
the next panel, the software continues to go to the next panel, until
this "current url from list" is different).
This button is useful to check what websites are left just before the
end of your submission (but it will only work if at the end when there
is no more website, you load the site with the position 1 with the 0
button).
---
Other buttons of
the main panel:
Click:
Simulate a click (you need to save first the button with which you want
to simulate the click with the "system" context menu).
Rst from list: delete the current entries of the form fields using
the keys associated with the current website.
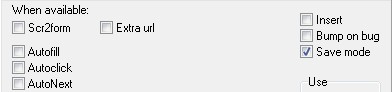
---
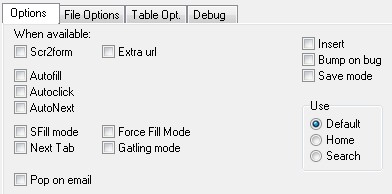
Scr2form:
If this box is checked, the software will go to the position of the
last FORM tag it founds when the page is fully loaded (sometimes a
tag can start in the code before it starts visually).
Extra url: Append to the key "url", the name of the file
associated with the "recip" of the current webpage (see panel
"Url settings">> column "File (relative path)"
).
Insert: if this option is checked, then instead of settings values
of form fields, you will be able to insert text (works like an assistance
to write text). This is useful if you need to add several informations
on a unique text area, like on the text area of a forum for instance.
Bump on bug: display a message if a bug that is not handled occurs.
Save mode: Allow to save datas added to forms with the "Submit"
context menu.
Next Tab: If you click on
you go to the next browser panel.
(navigation
window):

Gatling Mode: This option works nearly like "Next Tab",
but in fact each time you load a webpage in a web browser, instead of
waiting that the page loads, the next navigation panel is activated.
It
means that if you click on
or if you click on a link in a browser, the next navigation panel will
be activated. With this mode, you will save time because you don't need
to wait that a page is loaded or you don't need to select the next panel
manually.
If
the AutoFill option is also checked, you can then fill up forms automatically
just if you change your browser panel. Don't use this option if you have
problems with your Internet connection or if some sites take time to load
because this feature can make the software freeze if you try to fill up
a form and if there is no form in the browser because the page is not
loaded.
Click
on "x" if it happens:
Autofill:
fills the form(s) on the current page in 2 possible cases:
- if the current webpage is totally loaded or...
- if you change your browser panel then the software will try to fill
up the forms of the new panel.
AutoClick:
Not recommended (click to read how to set up).
AutoNext:
Not recommended (click to read how to set up).
With
AutoClick, AutoNext and Gatling Mode checked in the same time, you can
freeze your computer, usually if your computer is old or with a bad internet
connection: the software will load 10 pages in the same time in 10 browsers.
AutoClick
and AutoNext are not safe to use, because there is no real way to stop
to submit something wrong if an error happens. Also there is a timer in
the software that will stop the software to click or go to the next website
after a given amount of time once the current page is loaded, so it is
sometimes needed to click manually on a button or to go to the next website
yourself. Autoclick is efficient on the most common buttons, but not on
all.
---
The
P button is only activated if the option "Add this code for recip
generation" is checked.
P:
is used to order the "recips" that you will use for your submissions
with the HTML code of the text area.
The
code of the text area is used and each time that a code <!--recipsupsubmit-->
is found, it is replaced with the HTML code of one of your "recips".
When there is no more <!--recipsupsubmit--> then the resulting code
is pasted in an HTML output. If there is a "recip" code left
in your "recip" source, then a new copy of the code of the text
area is used and the "recip" codes left are used to replace
the <!--recipsupsubmit--> again and again, until there is no more
"recip" code left.
If
the option "Add this code for recip generation" is checked,
then the fact to create files with "recips" ("Urls Settings"
>> "Create file") will add to your index webpage the content
of text area at the beginning or at the end of the HTML file. Each <!--recipsupsubmit-->
will be replaced with a recip code.
Also
note that the fact to have a <!--recipsupsubmit--> code in your
index file, will do that each time that there is a <!--recipsupsubmit-->,
it will be replaced with a recip code. Without the option "Add this
code for recip generation" and without a <!--recipsupsubmit-->
in your index, a "recip" block is only added at the beginning
of the file when your generate your files with "recips".
Splitting
each stages of the generation of these files with recips, allows to act
at several levels of the generation to have a better control.
If
you find that this generation is hard to understand, it is perhaps not
very useful in function of your use of the software.
---
Go2form:
Allow to go to FORM tags: you can click several time to go to the position
of the next tag.
Sys:
If you right click on it: you see the "system" menu but all
options are not available.
Cat:
If you right click on it: you see the category menu.
Start:
Allow to load the next 9 sites in the next 9 browsers, the site of the
"Main Browser" is not changed. It is recommended to use this
button at the beginning of a submission (and only at this moment).
First
u: Allow to reload the body source in the memory of the browser. Usually
used to unframe a website.
Second u: also used to unframe but using another way.
(This
2 buttons are useful if you need to submit to a site with FRAME. A site
with FRAME can be hard to configure.)
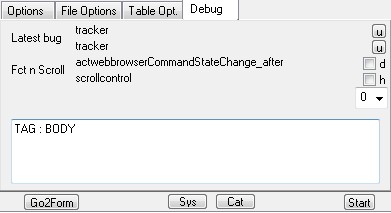
d
box: display debug informations if you fill up a form.
h
box: Allow to fill hidden form fields: usually Supsubmit doesn't try to
change them because they are invisible for the user.
The
0 (from the drop down box): change the size of the informations
of the navigation bar (bottom of the software):

Each
information (field 1 to 5) is given on the full size of the bar.
-14
Known bugs
-
Don't use with a resolution lower than 1024x768.
-
If you change your screen resolution, and if you maximize your software's
screen, A graphical bug can occur. Solution: switch back in window mode,
or reboot your computer before you use the software.
-
Sometimes there is a bug when you type something in one of your browser
just after a first bug. Solution: Close and restart the software (remember
to reload your reciprocal files), or you can write what you want
to write in a text editor and paste your text using your context menu,
or reload your page in another browser window and stop to use the
browser window that bugs.
-
It's possible to fill FILE inputs in FORMs with Supsubmit, however if
this function works pretty well if you have Internet Explorer 7 installed
on your computer, this functions may bug if you have Internet Explorer
8 (theorically FILEs input are protected under IE 8).
The
result of this function may change a lot from a configuration to another,
that's why it is perhaps better that you select your files manually.
If
you have IE 7, SupSubmit can enter what you want (whether the file exists
or not), with IE 8, you have to specify a file that exists. The insert
mode is not available on FILE inputs with IE 8.
Also note, FILE inputs are supposed to be write protected (for safety
purposes).
- To
prevent bugs, it is recommended to close and restart the application at
the end of a submission, before you start a new one.
-
To prevent bugs, it is not recommended to click on buttons or links that
closes the browsers of the program.
-
If you need to use one of the function that needs tags, for example to
handle recips, use lowercase tags, (<table> and not <TABLE>
for example) in your HTML files. If you need to use uppercase tags, use
<!--recipsupsubmit--> to handle recips. For some reasons, the software
can detect <BODY> and <body> tags.
-
If you try to close the software, if the software is busy, it won't close.
If you try to click again, a new dialog box will appear: "Force to
close", if you click and close, be sure that the software is out
from the memory of your computer with CTRL + ALT + SUPPR and if needed
removes the software from your memory.
-
Don't try to modify your lists during a submission (update, delete), you
will lose your recip datas (but you can of course reload them).
-
If you need to delete websites: remember that if several browsers have
the same position in the list, if you delete the current "url from
list" on a browser then the other browsers will lose their own "url
from list" too.
-15
Technical support
If
you bought a licence key (key.ini), add this file in the directory of
supsubmit or open the file and use the first line as username and the
second line as serial number.
Tested
only Vista and XP.
To contact
us, go to the contact page (see on the top menu). The technical support
is possible on Vista or XP only.
Remember
that this software is not free of bugs.
|